motorized zebra shades
Key Features of APRILSMART motorized zebra shades
APRILSMART factory direct sales price is much lower than local retail stores and supports single-piece delivery. If you purchase > 8 pieces, you can contact us to enjoy wholesale discounts. Customers who accept 30-50 days sea freight can enjoy additional discounts
Smart Home & Automation
Wi-Fi/Bluetooth Connectivity
Compatible with Alexa, Google Home and SmartThings, programmable open/close times.
Personalized Control
Supports control of 15 groups of curtains, or individual control, 3 adjustment speeds to meet daily needs.
Premium Customization
Precise Fit Guarantee
Custom cut to fit your window size (interior or exterior).
20+ fabric colors and textures
A wide range of shades to match any home style. All fabrics are OEKO-TEX® and UL certified for safety and quality.
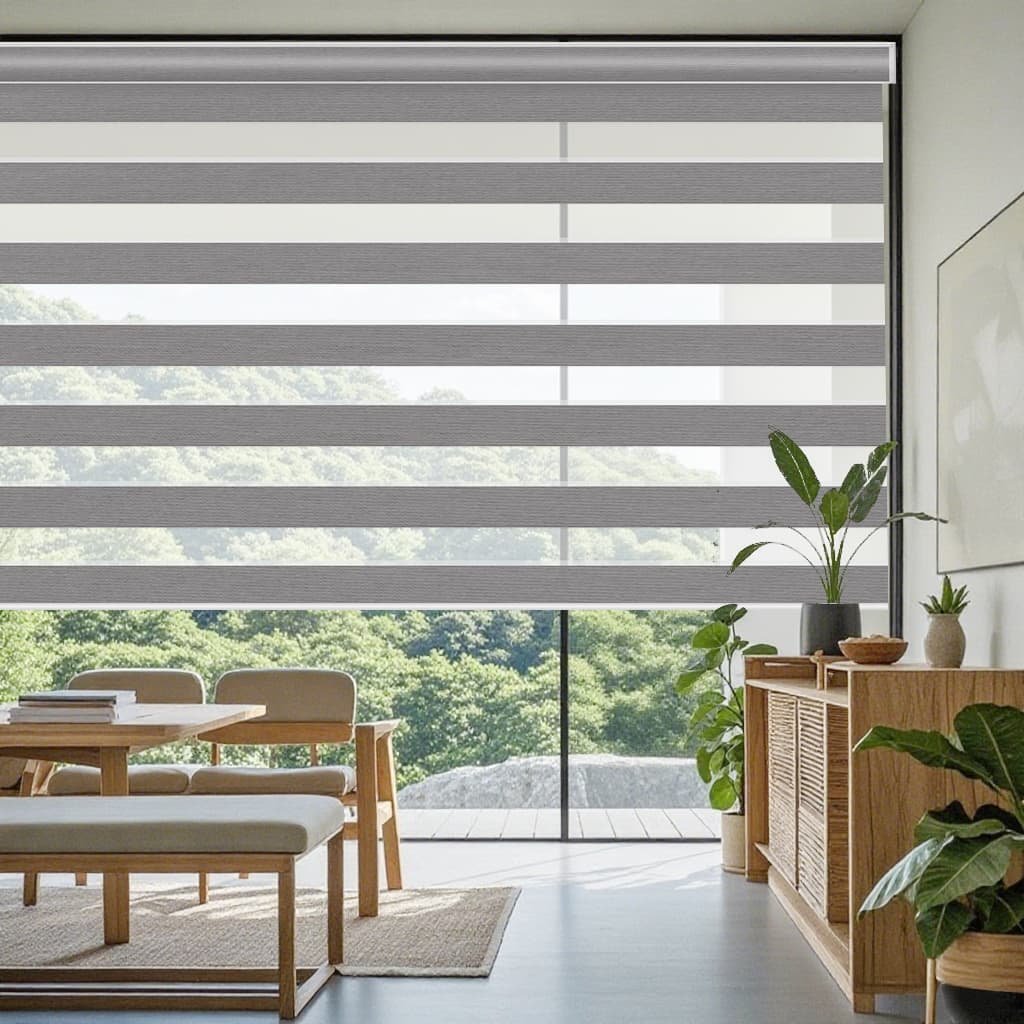
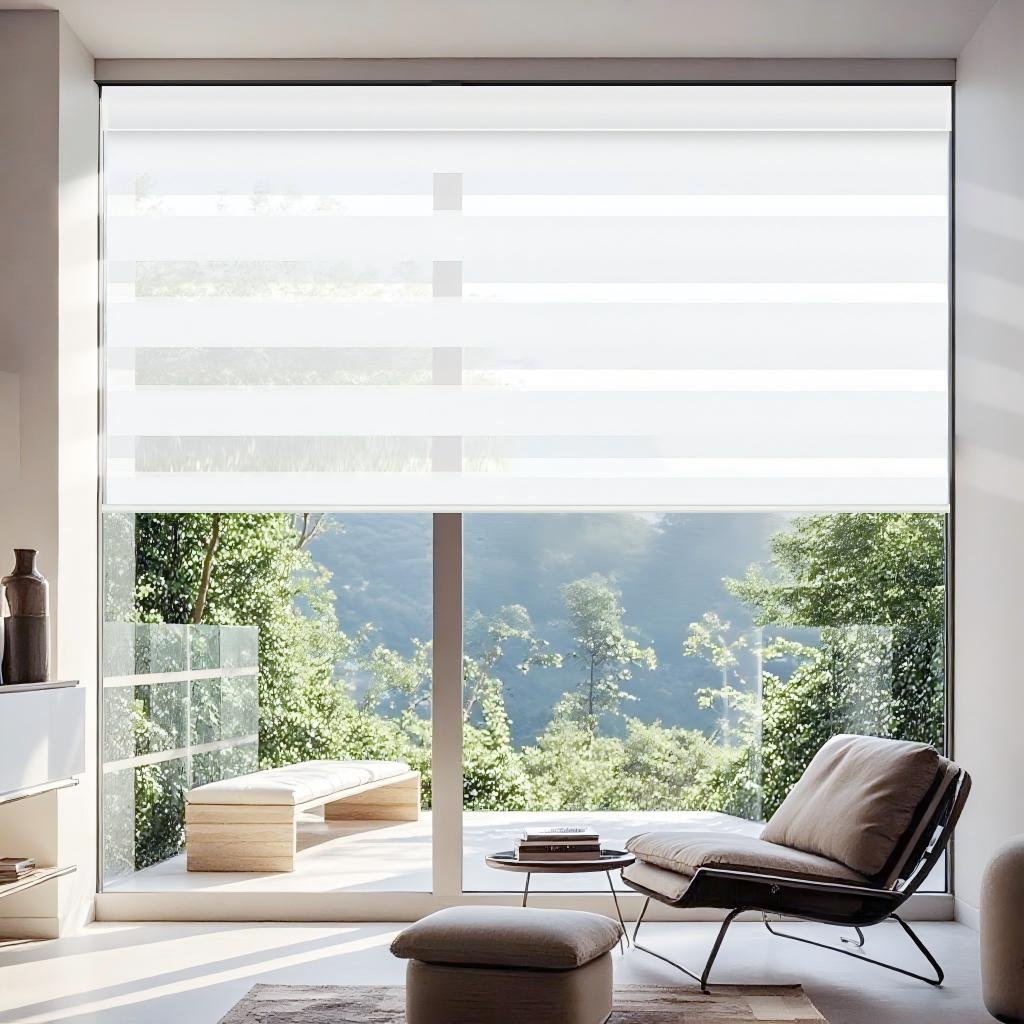
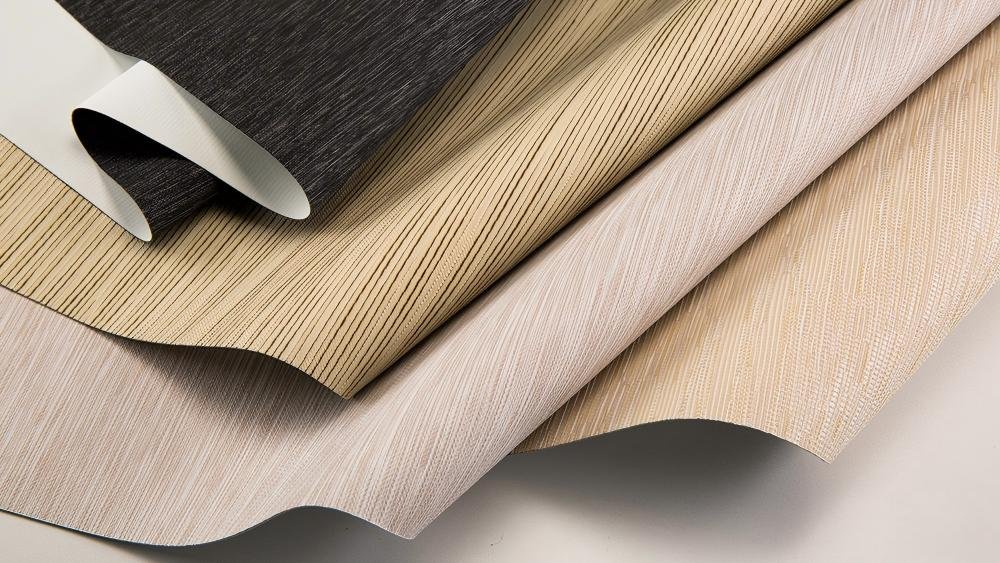
Ultra-smooth dual-layer fabric design
Adjustable light control
Seamlessly switch between transparent and blackout modes by adjusting the dual-layer fabric.
70% blackout options
Perfect for bedrooms and theaters, reduce glare while maintaining a soft, elegant aesthetic.
Quiet, powerful motor operation
Quiet smart motor
Operates at less than 35 dB and enjoy near-silent adjustments via remote, app, or voice control.
Long-lasting battery
4-6 months per charge, ensuring easy operation without hard wiring.
Child and Pet Safety
Cordless Design
Cordless design creates a safer environment. And carry the Best for Kids™ certified.
Durable Construction
Made of high-quality materials to ensure long-lasting durability.
Custom Motorized Zebra Shades
At APRILSMART, we understand that every home has unique requirements. Our custom motorized roller zebra shades are precision-engineered to fit your exact windows while delivering seamless smart functionality and elegant style.
Measuring Your Windows Accurately
Step Guide
Comprehensive Description
For successful installation, check for window hardware like cranks or handles that may obstruct shade operation, and note that roller shade fabric measures approximately 1 inch (2.7cm) narrower than the ordered valance width.
NOTE: Please measure the dimensions of the window; do not take any deductions for clearance; we will produce the blinds of the appropriate size for you.
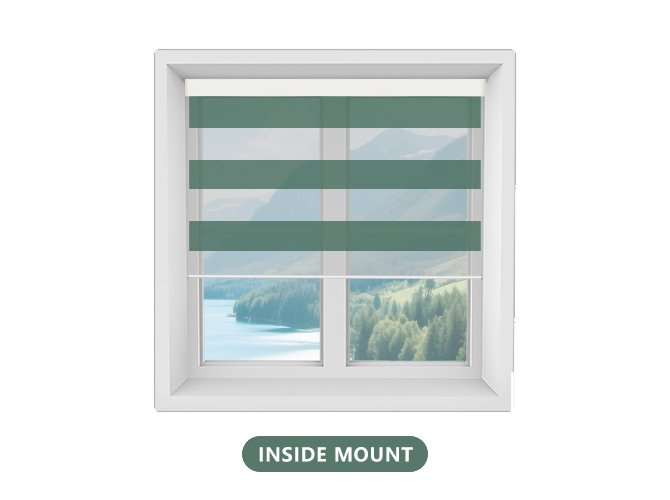
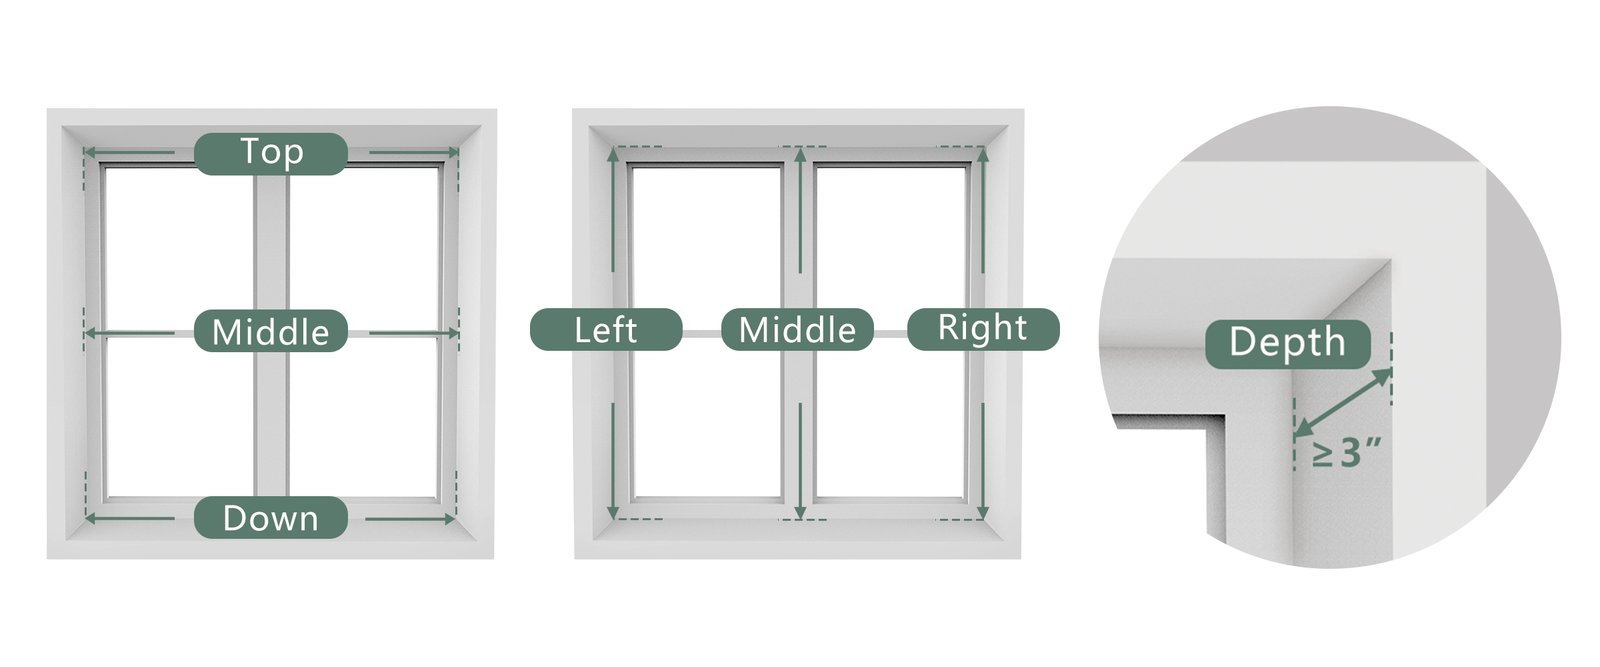
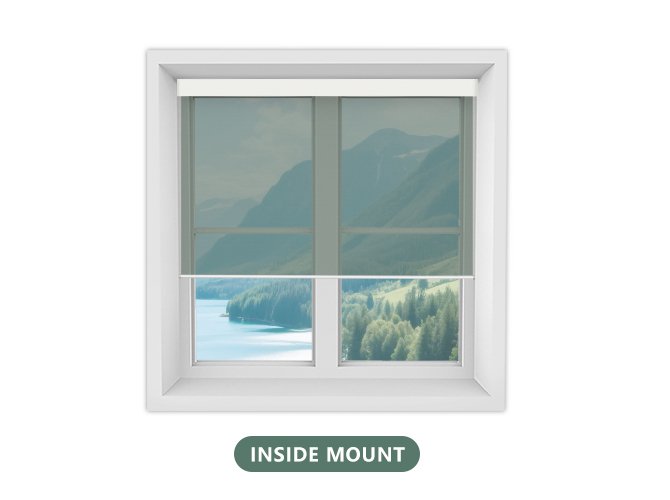
Inside Mount
Measure Width Top/Middle/Down:
Measure the width in 3 places. For width, use the smallest measurement.
Measure Height Left/Middle/Down:
Measure the height in 3 places. For height, use the longest measurement.
Order Width = Shortest Measurement Width = Whole Item Width
Order Height = Longest Measurement Height = Whole Item Height (Window depth ≥ 3″)
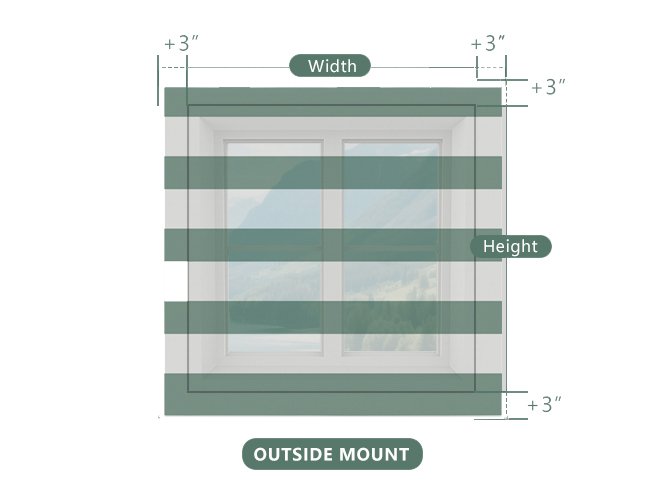
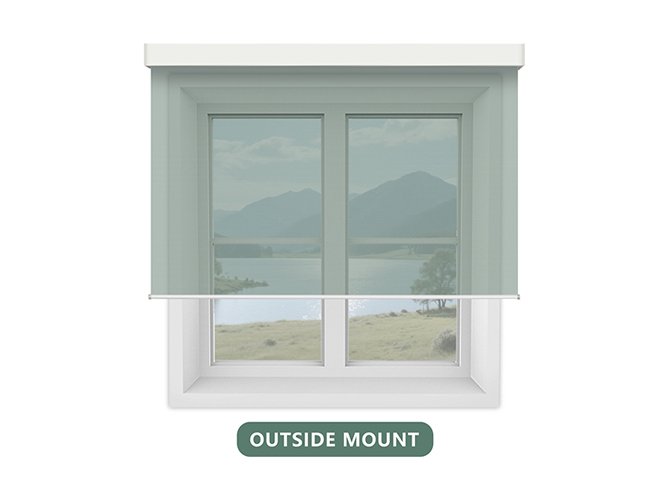
Outside Mount
Measure Width To Be Coverd:
Measure width to be covered. We recommend adding 6 inches to the width you wish to cover for optimum light control and privacy.
Measure Height To Be Coverd :
We recommend adding 6 inches to the width you wish to cover for optimum light control and privacy.
Order Width = Measured Width + 6”=Whole Item Width
Order Height = Measured Height + 6” = Whole Item Height
How To Install Motorized Blackout Roller Shades
Universal Step before Installation
Step 1: Gather Tools
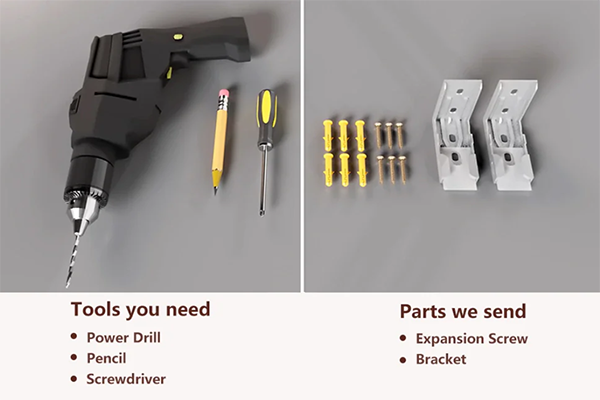
Step 2: Verify Package Contents
Before commencing installation, carefully inspect the package to verify that all essential components (including screws and brackets) are included and correspond to your order specifications. This ensures an efficient and trouble-free assembly process.
Step 3: Confirm Mounting Location
Selecting the Optimal Mounting Location for Your blackout zebra shades
Inside Mount (Recommended for a Clean, Built-in Look)
Install within the window recess, ensuring a minimum 3″ (7.6 cm) depth for proper bracket placement.
If your window frame is shallower than 3″ but you still prefer an inside mount, contact our support team at support@aprilsmartblinds.com for a customized solution.
Outside Mount (Ideal for Shallow or Non-Recessed Windows)
Choose a flat, sturdy surface suitable for drilling.
Ensure the mounting area can support the shade’s weight and operation.
Inside Mount
Top Mount
If you opt for an inside mount and your window frame width allows, top mounting is the optimal choice
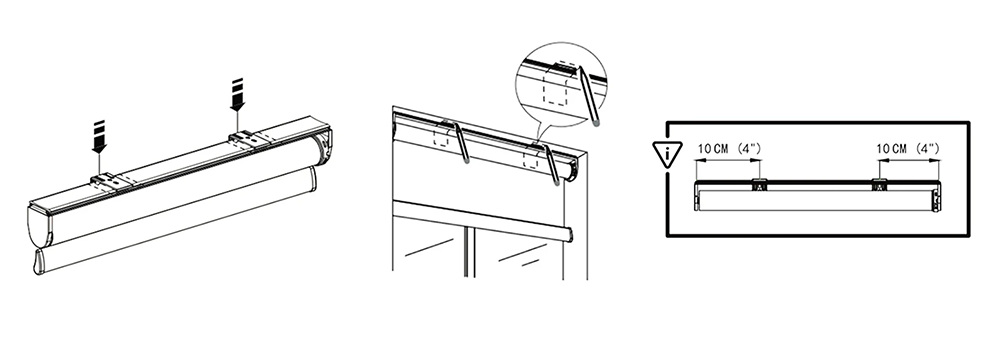
Step 1: Mark Positions
– Align the wall and shade brackets, ensuring the side caps are centered 4 inches (10 cm) from each bracket for optimal stability.
– Use a pencil to mark drilling points on the wall through the bracket holes.
Step 2: Install the Brackets
1.Drill Pilot Holes
Using a power drill, create pilot holes at the marked screw locations.
2.Insert Expansion Sleeves
Gently tap the provided expansion sleeves into each drilled hole until flush with the wall.
3.Secure the Brackets
Align the brackets over the holes and insert the expansion bolts.
Tighten firmly with a screwdriver to ensure a rigid mount.
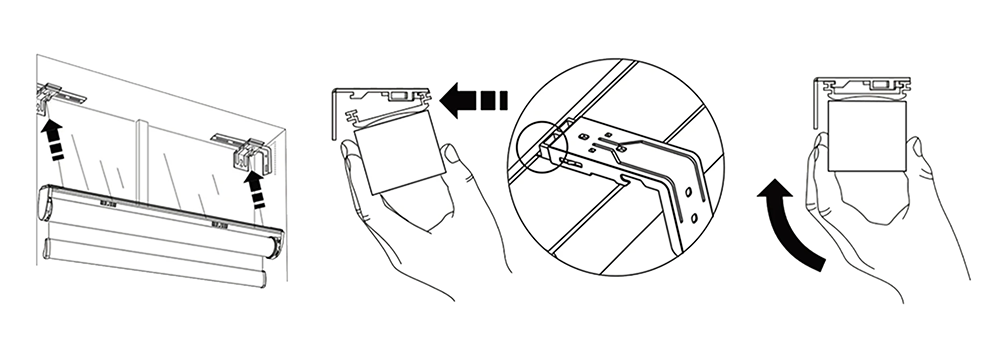
Step 3: Install the Shade
•Insert the front rebound part of the bracket into the shade valance
•Hook the rear end of the bracket into place
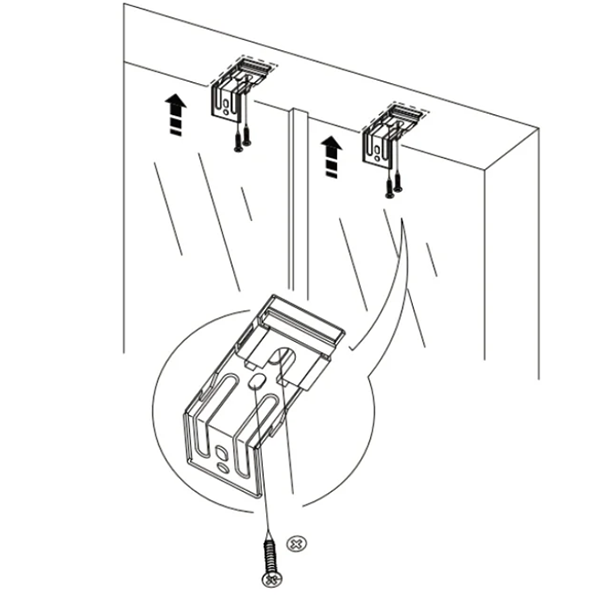
Side Mount
If an inside mount isn’t feasible due to insufficient window depth, a side mount using extension brackets is recommended.
Step 1: Mark Positions
– Position the extension brackets on the side walls adjacent to the window.
– Use a pencil to mark the screw holes, ensuring they are level and symmetrical on both sides.
Step 2: Install Brackets
– Attach the extension brackets to the side walls using the provided screws.
– Fix the installation brackets to the extension brackets, ensuring a rigid connection.
Pro Tips for Optimal Performance:
✔ Install brackets as close to the top of the window frame as possible to minimize light leakage.
✔ Use a level to guarantee both brackets are perfectly horizontal for smooth shade operation.
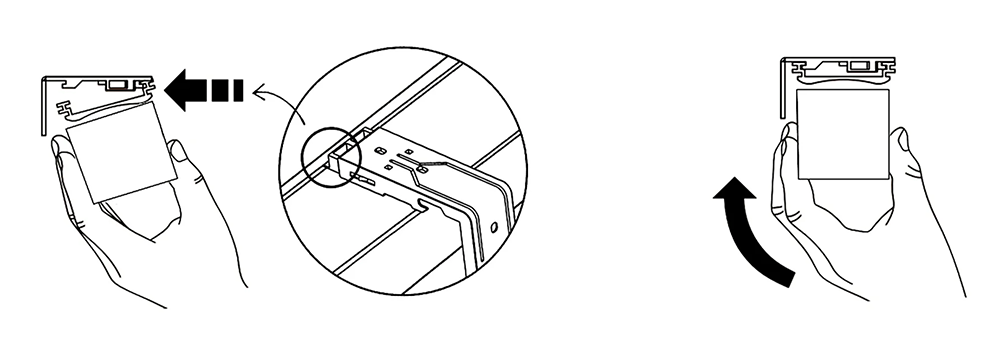
Step 3: Install the shade
– Insert the front rebound part of the bracket into the shade valance
– Hook the rear end of the bracket into place
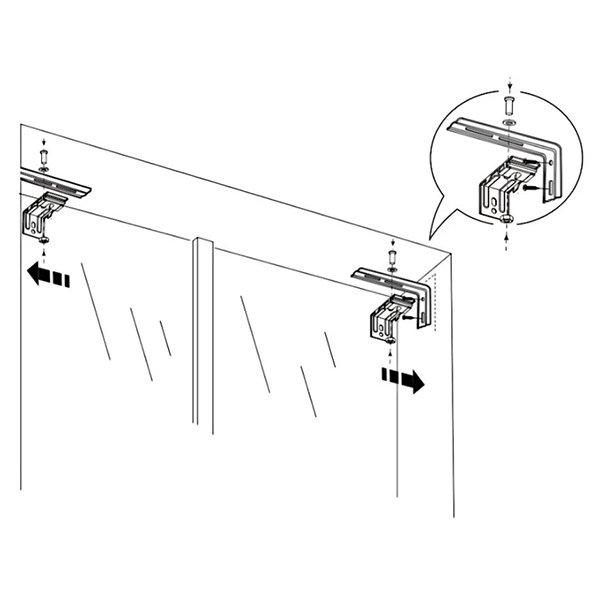
Outside Mount
Top Mount
If you choose to install it outside and the space allows, top installation is the best choice. The operation steps are similar to top mount installation in inside installation.
Note: For inside installation, you need to determine the position of the brackets on the wall and the shade, while for outside installation, you need to determine the position of the two brackets above the window frame and the shade.


Ceiling Mount
If you choose an outside mount but find that the space is insufficient for bracket installation, consider mounting it on the ceiling. The operation steps are similar to top mount installation in outside installation.


Fabric Choices & Custom Colors
Fabric Type & Light Control
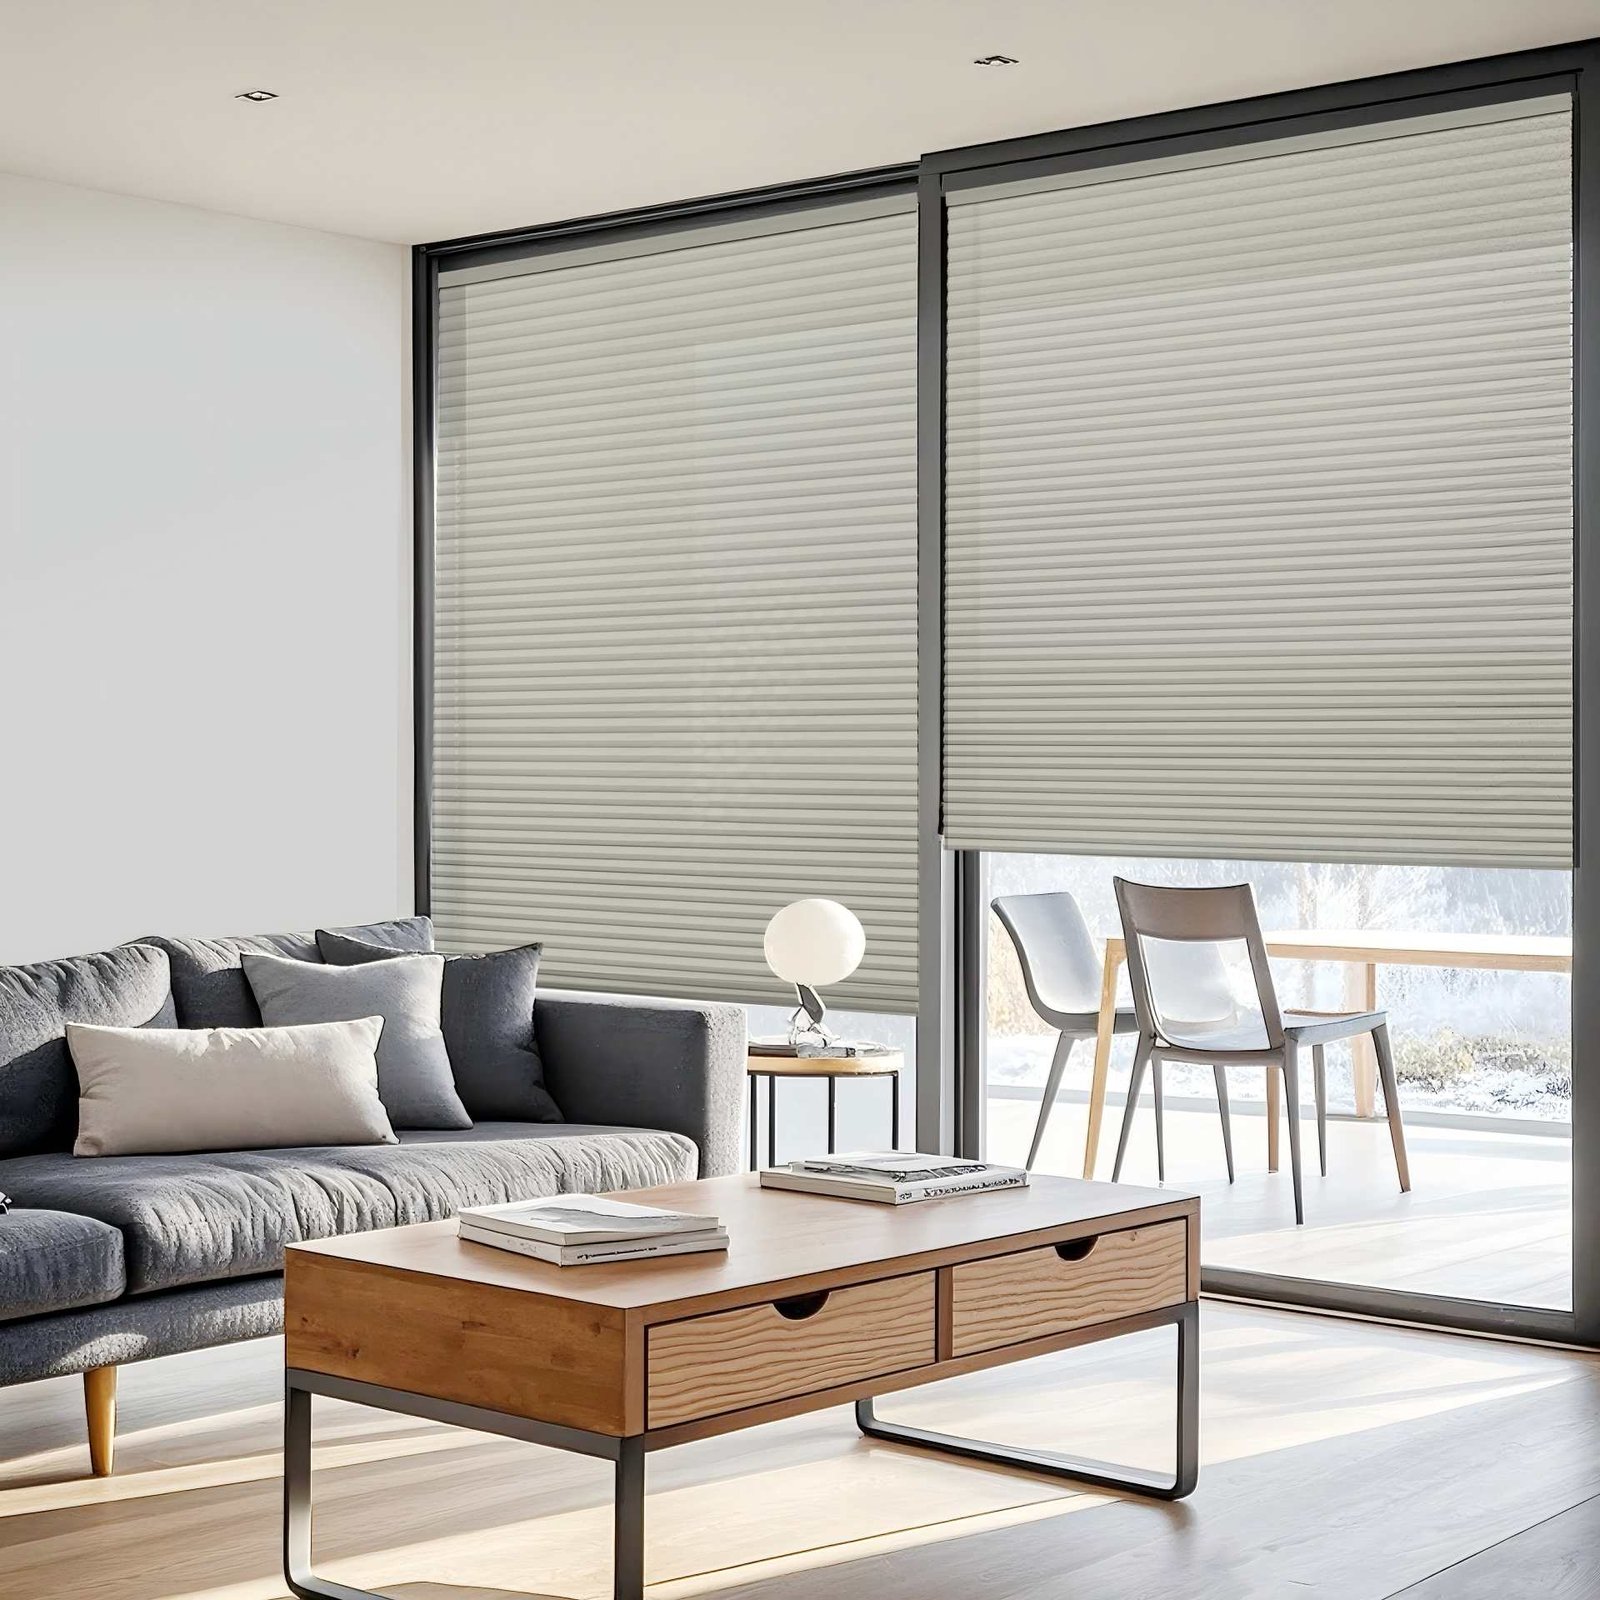
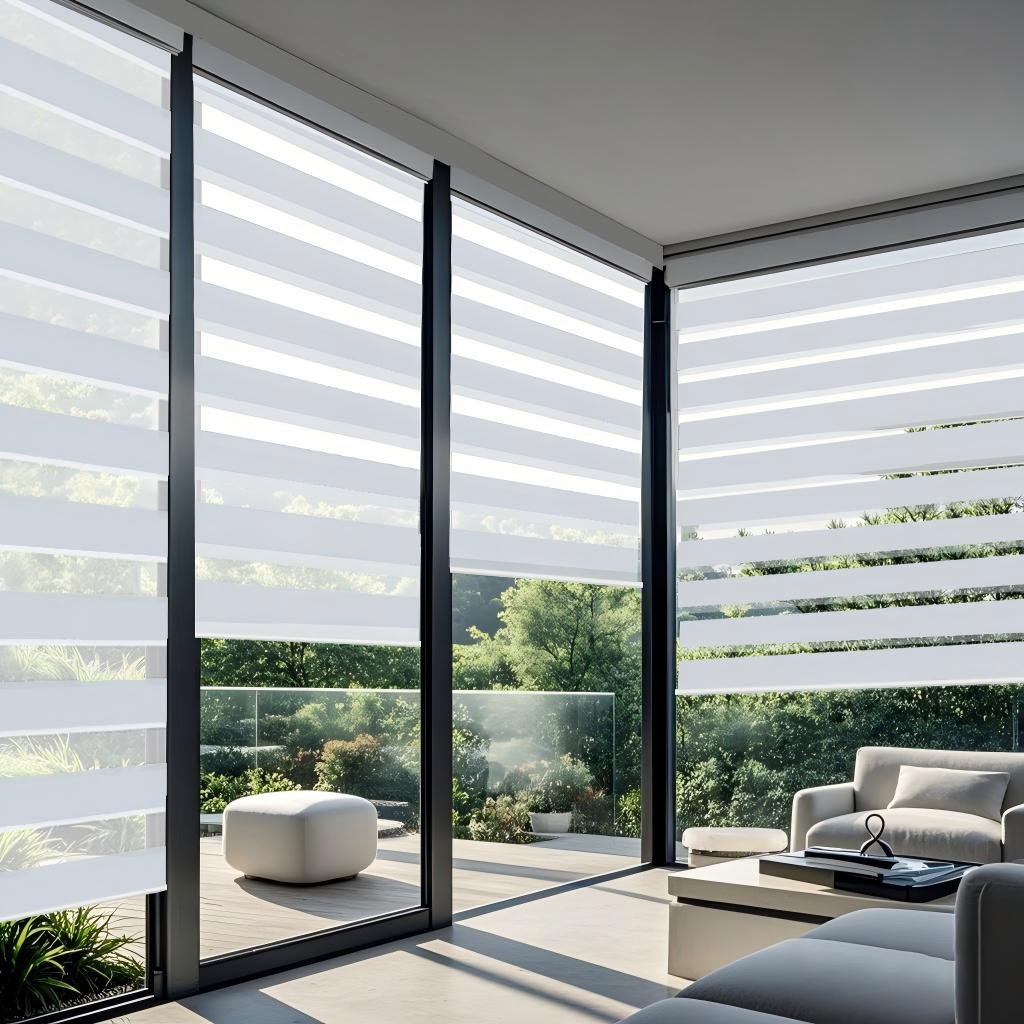
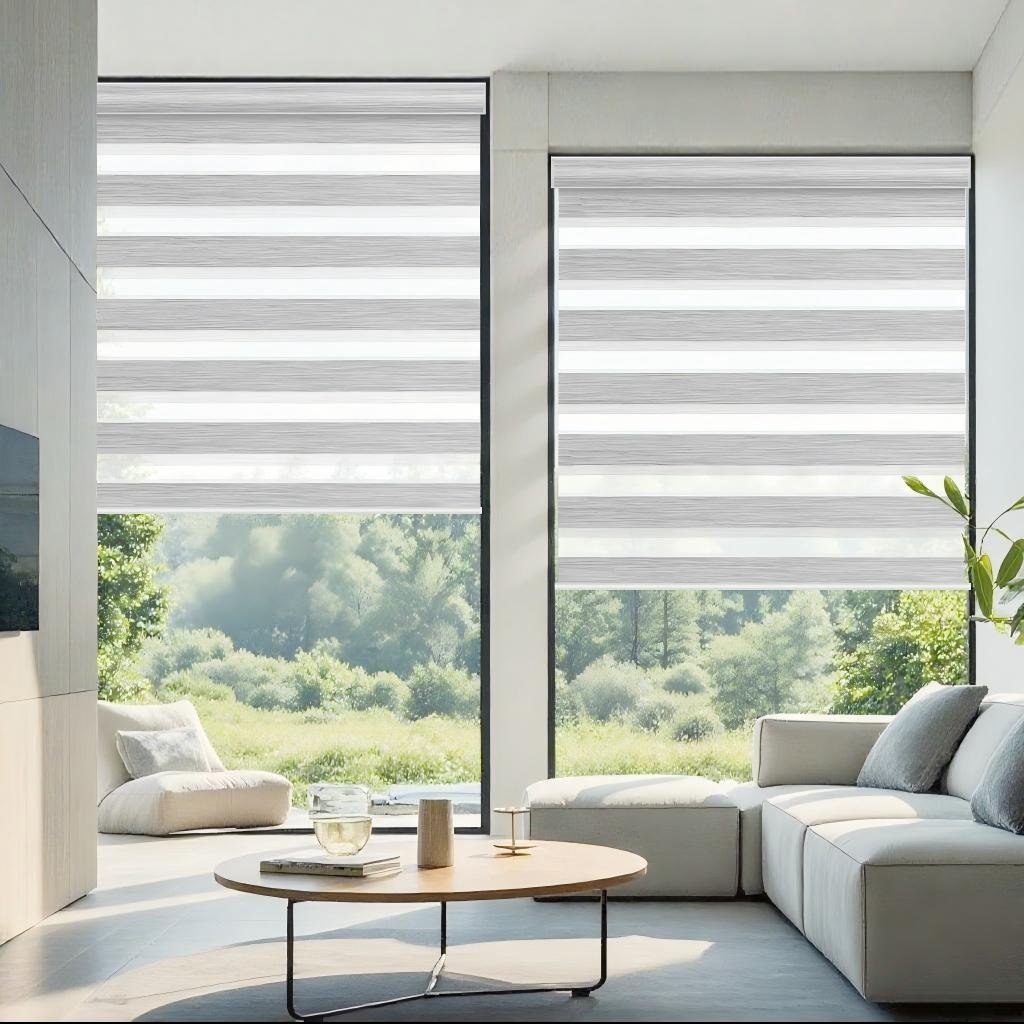
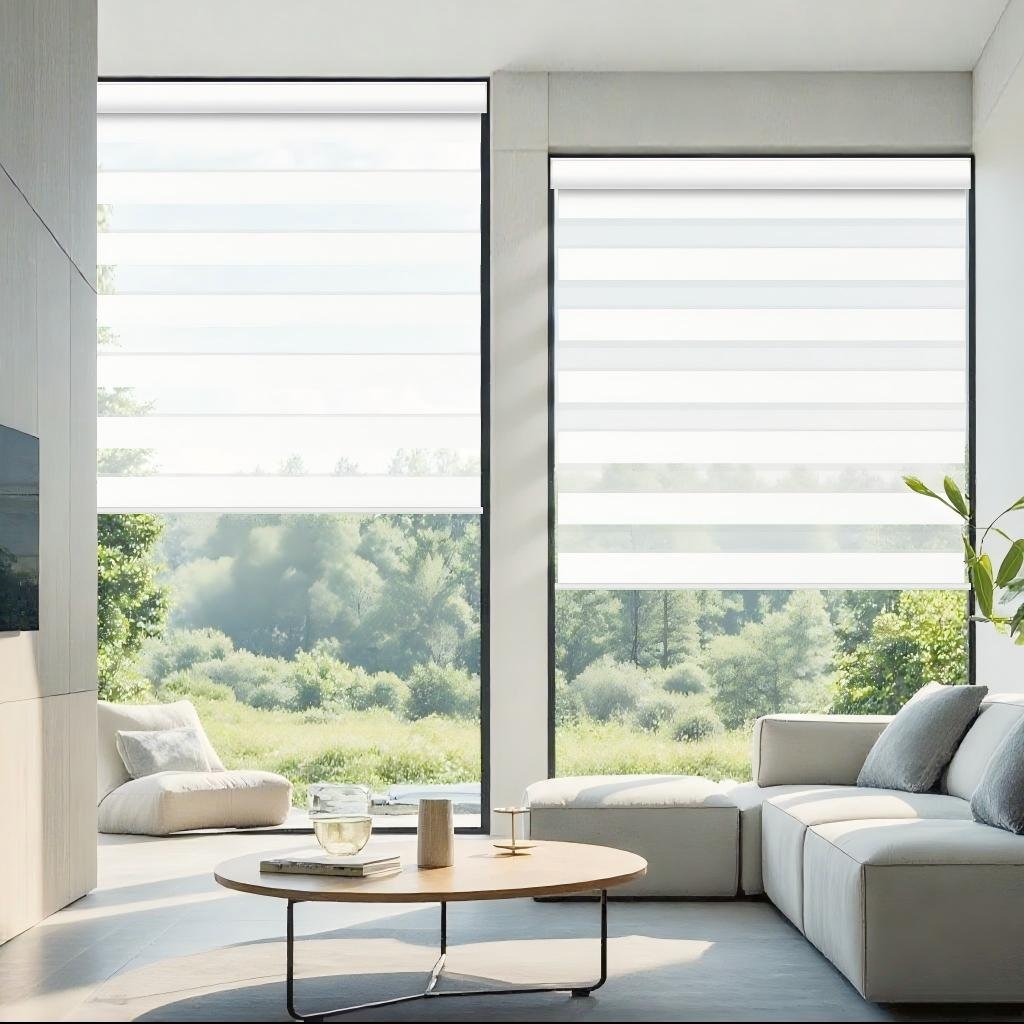
APRILSMART motorized zebra blackout blinds feature an innovative dual-layer fabric system, seamlessly alternating between sheer and blackout panels for customizable light filtration. With an adjustable shading range of 60% to 100%, these shades provide versatile solutions for:
Soft diffused lighting (60%-80% shading) – Ideal for living rooms and offices.
Enhanced privacy & glare reduction (90%-100% shading) – Perfect for bedrooms and media rooms.
* Crafted from high-quality, durable textiles, the fabric ensures smooth operation, UV resistance, and long-lasting performance.
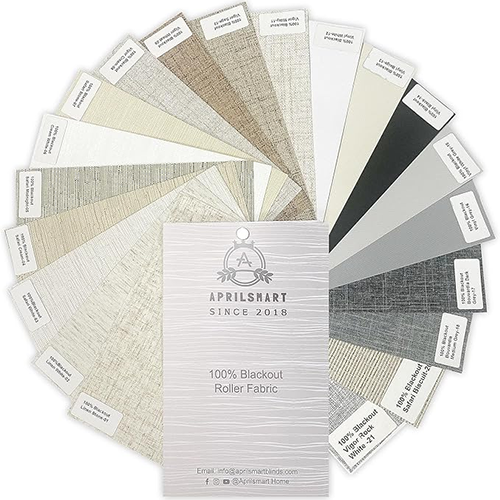
Color Options
Available in a curated selection of on-trend hues and timeless neutrals, our shades complement any interior style:
Solid Color Series
Crisp Pure White | Warm Ivory | Soft Beige
Sophisticated Light Gray | Deep Charcoal | Classic Black
Natural Texture Tones
Organic Linen | Earthy Sand | Subtle Stone Gray
Rich & Modern Accents
Elegant Navy Blue | Tranquil Forest Green | Bold Espresso Brown
* Custom color-matching available for bulk/commercial orders.
Motorized Zebra Shades Q&A
How to Maintain Your Zebra Shades?
Proper care ensures your motorized room darkening zebra shades stay beautiful and functional for years. Follow these expert maintenance tips from APRILSMART:
Dust regularly: Gently wipe away dust and debris from the curtains with a soft, dry cloth or feather duster.
Vacuum: For a more thorough clean, you can use a vacuum cleaner with a brush. Be sure to set the suction power to low to avoid damaging the fabric.
Spot Cleaning: If you find any stains, use a mild detergent mixed with water and gently wipe the stained area with a soft cloth.
Avoid excessive moisture: Moisture can cause mold. If the sunshade gets wet, wipe it dry immediately with a soft cloth.
Inspect the Mechanism: Regularly inspect the lifting mechanism for signs of wear or damage. If any problems are found, consider contacting a professional for repair.
Professional Cleaning: If they are heavily soiled or stained, consider having your Zebra shades professionally cleaned
Storage: If you need to take down your curtains for any reason, store them in a cool, dry place away from direct sunlight to avoid damage.
Where to Buy Reliable Motorized Zebra Shades?
Welcome to purchase APRILSMART motorized zebra blinds light blocker. We provide one-stop service for each customer, including pre-sales size measurement guidance, customization support, after-sales installation guidance, maintenance policy, etc., aiming to meet the personalized needs of each family.
Buy now or if you have any questions, please contact us!
What window styles are ideal for motorized zebra shades?
Motorized zebra shades (also known as dual roller shades or transitional shades) combine light control and privacy with modern automation. Motorized zebra shades work best on large, hard-to-reach, or frequently adjusted windows.
1. Large Picture Windows
Motorized shades work seamlessly on expansive windows, offering effortless control over light and privacy without the hassle of manual operation.
Best Placement: Floor-to-ceiling or wall-to-wall installations for a sleek, modern look.
2. Sliding Glass Doors & Patio Doors
Zebra shades provide adjustable light filtering, and motorization eliminates the need for cords, making them safer and more convenient for high-traffic areas.
Best Placement: Full-height coverage to maintain a clean appearance.
3. Bay & Bow Windows
Motorized shades can be individually controlled to adjust each panel, allowing for customized light diffusion while maintaining symmetry.
Best Placement: Inside-mounted shades for a flush fit or outside-mounted for full coverage.
4. Double-Hung & Casement Windows
Zebra shades complement traditional and modern windows alike, and motorization ensures smooth operation without interfering with cranks or sashes.
Best Placement: Inside mount for a streamlined look; outside mount if depth is limited.
5. Skylights & Clerestory Windows
Hard-to-reach windows benefit greatly from motorization, allowing remote or smart-home-controlled adjustments. Zebra shades diffuse light beautifully in overhead applications.
Best Placement: Custom-sized to fit the skylight frame.
6. Corner Windows
Motorized shades can be synchronized to operate together, creating a cohesive look while managing light from multiple angles.
7. French Doors & Windows with Divided Lights
Zebra shades offer a contemporary contrast to traditional divided-light designs, and motorization prevents cord clutter.
Which materials are commonly used to make motorized zebra shades?
A. Polyester
Pros: Affordable, durable, wrinkle-resistant, and available in many colors/patterns.
Cons: Less textured than natural fibers.
B. Polyester Blends
Pros: Mimics the look of linen or silk but with better durability and stain resistance.
Cons: Slightly less breathable than natural fibers.
C. Faux Linen
Pros: Lightweight, textured appearance, resists fading.
Cons: Less insulating than real linen.
D. Sunscreen
Pros: UV protection, glare reduction, and daytime privacy.
Cons: Limited nighttime privacy unless paired with blackout layers.
E. Blackout-Coated Polyester or PVC
Pros: Blocks 99%+ of light, enhances privacy and insulation.
Cons: Heavier, may reduce the “floating” effect of zebra shades.